Check out the whole process and pictures here....
Friday, August 13, 2010
Ikea Kitchen Remodel
I finally got around to posting a full set of pictures on to flickr. Here are some pictures of the completed kitchen. Let me know what you think.
Check out the whole process and pictures here....
Wednesday, July 28, 2010
So finally getting around to posting some pictures of our kitchen remodel. This little project happened between Oct 2009 and Jan 2010. It was three months of hard work but well worth it. There are a ton of pictures to post so I will open an album on Flickr once I upload them but in the meantime here is a before and after shot of the remodel.
BEFORE
Notice the lack of space between the counter and the top cabinets, there was not enough space for some of our appliances. The soffit between the cabinets and the ceiling moved the cabinets down and reduced the amount of space for appliances. The tall "L" shaped island removed a lot of space from the kitchen.
AFTER
The picture is a bit dark but the cabinetry is the same color as the previous post from the DWELL magazine. We have white Zodiaq counter tops and mostly stainless steel appliances. You can see the soffits were removed and that added space between the countertop and the top cabinets allowing us to use the blue glass tile for backsplash all the way up to the ceiling.
Stay tuned for more pictures and the step by step explanation of the remodel.
Monday, July 19, 2010
Our kitchen on Dwell magazine
Well, not really. I found this kitchen featured on the latest issue of Dwell magazine and there are components of the design that are very close to our kitchen. Of course unless you have seen it in person, you cant tell but don't worry, pictures are coming soon.
The elements that resemble our design are the white countertops, the honey brown cabinet color and the gray colored floors.
Revamping the blog
Ok so I have been busy these last few months and my computer has had a few problems so in order to get my blog going again, I will blog from my phone. The next few posts will be kitchen related but in the meantime I will leave you with this picture of beautiful Bella.
Tuesday, April 27, 2010
I love the smell of fresh cut cedar
We went to the White Rock Home Tour this weekend and I got the brilliant idea and inspiration to build a bench. We did not even make it home when we decided to pull the trigger and stop at Home Depot.
First things first, we select the best looking 2x8 boards we could find.
After some guessing and arguing, we decided our bench would be 5 ft long and 18 inches tall. Since they can cut the wood at the store we went ahead and got it cut.
First things first, we select the best looking 2x8 boards we could find.
After some guessing and arguing, we decided our bench would be 5 ft long and 18 inches tall. Since they can cut the wood at the store we went ahead and got it cut.
We came home and did some sanding of the boards since all HD carries is a rough finish. We didn't want our bums to be rough so we sanded all the boards.
After sanding, I realized 5ft was too long so I had to cut one foot off each of the boards. I then joined them together using a some wood screws and a plates.
After...
After...
Overall, the bench turned out really good. We are not sure if we want to stain it or not, we love the natural finish. Not a bad for a cheap impulsive project. Oh, by the way, see the kitchen back there? I will post some pictures soon on our 3 month remodeling project, this is just an unintentional sneak peak.
Monday, April 12, 2010
Cedar in the front
Ok, so now that we tested my cedar siding abilities in the backyard, we are ready to take it to the front. These aren't the best pictures, but you get the point. same process except this time we did not tear out the existing siding. The front was pretty clean and in good shape so we kept it instead of tearing out.
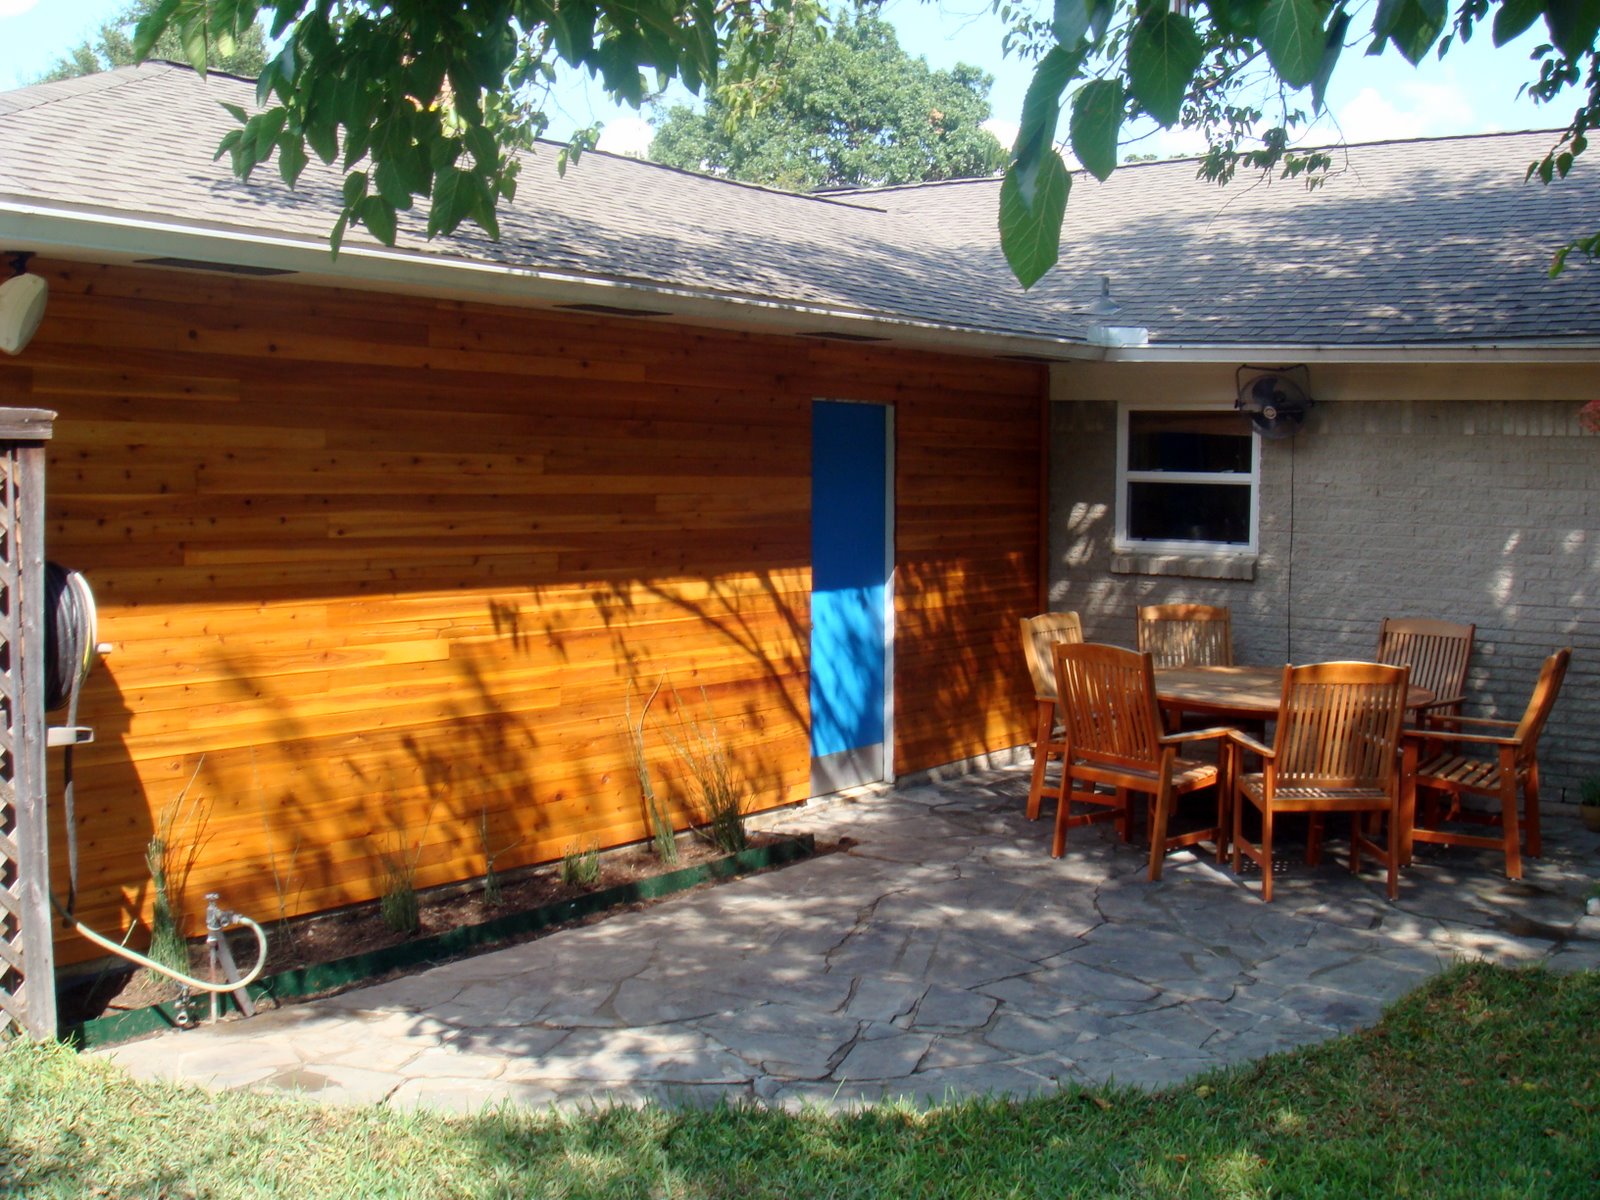
I only cleaned out the trim boards and nailed the boards straight to the siding. Same process, stain the back and sides before hand, nail the boards, stain the face once the boards are up.
Here is a shot during the day, we replaced the light fixture, removed the numbers from the door and added numbers directly underneath the light, hard to see in this picture.
Here is a shot at night time. I love the warm feeling the wood adds to the front, it is a lot more inviting than the plain white siding.
Thursday, April 8, 2010
The backyard siding - tear down
Here is what our back yard looks before. The typical board and batten siding, there is a planter all along the wall where there is not a single plant.
After some hard work, we tear down the siding and get the outside ready for its new cedar siding. You can see there are vines that at some point were growing behind the old siding.
The backyard siding - prep
We set up a staining operation with plenty of plastic to make sure we don't accidentally end up with cedar staind grass. We only stain the sides and the back of the boards. This will help with any moisture or condensation that may come from behind the walls.
All the boards, nice and lined up to dry
While the boards, dry, I decided to insulate the wall. Its a garage so I don't care too much about the temperature but I figured for the extra $15, might as well do it while the wall is open.
The backyard - final touches
OK, so we fast forward. My hands were sticky with the stain so I did not take any pictures of the cutting and nailing to the wall. It was about a 10 day process to nail theboards up since I had to cut and reseal each one of the boards.
Here you see the planter getting ready. This is bath tub linning. We are planting Horsetail Reed which spreads under anything. The linning is to keep the horestail in the planter with out spreading to the rest of the yard.
Here is the ship lap profile that I gave to each one of the boards. I did a special rig to a standard table saw and ran the boards. I could not find a lumber yard that would do this for a reasonable price. This profile provides a better seal from the outside air to the walls.Here you see the planter getting ready. This is bath tub linning. We are planting Horsetail Reed which spreads under anything. The linning is to keep the horestail in the planter with out spreading to the rest of the yard.
So here it is. It is hard to see the newly planted plants but trust me, they will grow to about 3 ft tall.
Subscribe to:
Posts (Atom)